GRAFFITI GRAPHIC DESIGN


9 Steps of How to Draw Graffiti Names?
Welcome to Guardian, "9 Step how to draw graffiti names". That is a theme which we will discuss this time. I will tell you the stages how to make graffiti name. Of course, that you who read this article to understand more about the art of graffiti. And you should be more like the contents of this blog. Actually to start this stage you should understand about the graffiti deeper. You can read the previous article.-Graffiti Tutorial about "How to Write Graffiti Letters?"
-Tutorial on How to Learn to Make Graffiti Art?
-How to make a graffiti with the Spray Paint?
-How to Write a Letter with Graffiti Alphabet?
-How to Learn the Graffiti Alphabet Style?
-How exactly do I write in graffiti?
Immediately, we begin the tutorial.
1. Discover the character of the identity of graffiti art. You can see the various designs graffiti in your town, or you can go to the internet to see the graffiti art that was so or you can try to create graffiti online at graffiticreator.net
2. After you find your style, you can immediately create an image or sketch graffiti on paper. Start by making graffiti with the name you because it is easy to do you think of the others. After aitu select styles and effects for the design of the graffiti you. You can choose a style that is popular today as a bubble or 3D effects. But like the 3D effect is something to suit beginners, so start with a simple effect like a bubble. After that let the ideas and your artistic imagination leads to more creative in developing the design of your graffiti to make it more beautiful, interesting and unique.
3. Outline the letters you have written to approximate the style you're going for. Again, use pencil and write very lightly, as you'll make many little mistakes. It will take time and patience to get the letters just right. Remember:
Make the original words you wrote your guide,
not your prison.
Don't be afraid to alter the letters
beyond all recognition.
4. Vary line thickness. You can make all the lines the same thickness, but you can approximate shading and a 3-D effect if the lines get thicker and narrower at different places (for example, the top and one side of an "o" might be very thick, while the bottom and other side is narrowed). Use your pencil to vary the thickness; you're going to darken this out with ink or marker later, so it doesn't need to be pitch black. By doing this step now, you can get a good idea of what thicknesses looks good before you make the lines permanent.
5. Add details as desired. Once your letters are as you want them, you can add additional details--with light pencil--if you choose to. Perhaps a lightning bolt for the dot of an "i" would be good, or eyes peering out of the holes in your "b". You can put a bubble around the whole name, like in comic books. The possibilities are limited only by your imagination.
6. Copy your drawing. Put the pencils away, so now, everything is permanent. If you make any disastrous mistake(s)--you won't be able to do much about it. Copy your drawing for a backup. Use a copier and adjust the darkness setting so that the light pencil lines show in the copy. You can also trace the drawing onto another piece of paper, but this will be difficult because of the lightness of your drawing. To trace what you have, wait until after the next step or trace a photocopy.
7. Blacken your pencil lines. Use pen or marker to darken the lines drawn with your pencil. These lines are more or less permanent, so be extremely careful. Don't be discouraged with small mistakes; you can usually fix it so nobody else will know. Say if your pen line was too thick or you were jogged and went outside of the line, just fill it in so it's 3D.
8. Add color to fill in your drawing with colored pencil, [[Make Dice With Tape, Staples, and a Marker|marker].] Again, it's a good idea to look at examples before doing this, but really you can do anything you want except crayon. A very simple graffiti (a single work of graffiti) can have only one color. You can also easily do each letter in a different color or make the added details a different color than the letters. While you might be tempted to go crazy with color, sometimes simplicity is best. Graffiti artists traditionally had to work secretly for fear of getting caught--many still do--and so they could carry only one or two different colors of spray paint at a time--a lot of very good graffiti is just one color.
9. Keep practicing. If your graffiti turned out perfectly, congratulations. Now move on to different words and effects. If your graffiti did not look perfect, well, just try again. Follow the tips below, and who knows? You might get better. Or you could just close your eyes and start praying that it looks better. Anyway, carry your own "black book" and don't copy people's.
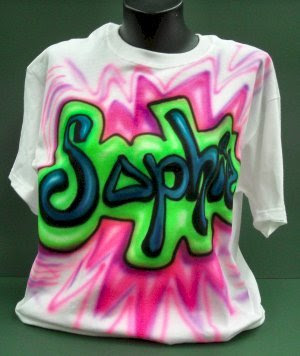
Please give your comments about this graffiti image, Thanks....


This comment has been removed by the author.
ReplyDelete